Snowbirds! with Michelle

It is so cold outside! The cold and snow inspired me, Michelle, to create these little snowbirds.

You can find the SVG files for this tiny 4″ birdhouse at the Lori Whitlock SVG Shop and also at the Silhouette Design Store. In the files, you’ll notice that the branch has leaves. With my Silhouette Cameo, I used the knife tool to remove the leaves because we won’t be seeing green for months!

I made some snowflake embellishments to keep the little birds company in my large vase. Lori has designed many gorgeous snowflakes, but this one is my favorite. You can find the set at the Lori Whitlock SVG Shop or at the Silhouette Design Store. Using Echo Park’s A Perfect Winter paper, the snowflakes cut perfectly each and every time. Adding glitter was a fun way to make them sparkle!

I hope that I have inspired you to create something fun today.

Stay warm! This weather is for the birds.

~Michelle

Gingerbread House Gift Box Tutorial with Michelle

Christmas is almost here! It’s time to add your those personal touches to your holiday preparations. If you are like me, Michelle, you’re going to need an extra box or two! Today I would like to share a tutorial for Lori’s Gingerbread House Box.

This is quite possibly the cutest gift box ever!

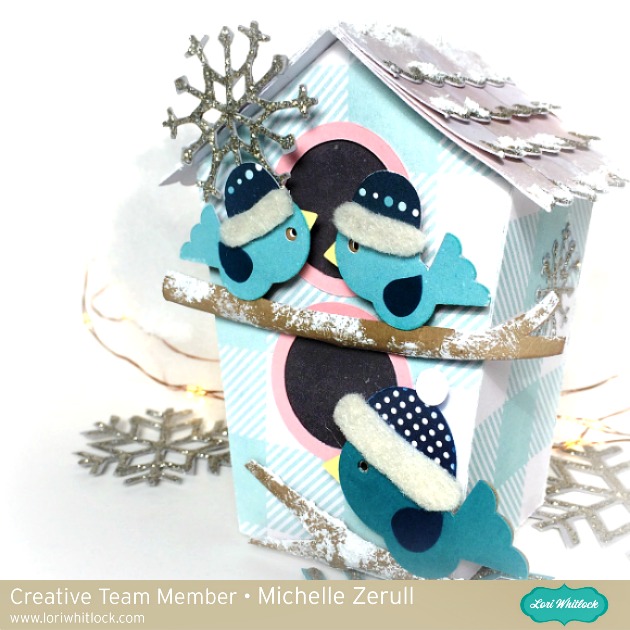
This little box is the perfect size for a generous helping of candy and cookie treats, a fuzzy pair of winter socks, or a gorgeous handmade ornament. Whatever your gift is, you’ll receive lots of “oohs!” and “aahs!” when they see this box!

You can find the SVG files to make your Gingerbread House Box at the Silhouette Design Store, or at the Lori Whitlock SVG Shop.

Open your files and get ready to cut! When you prepare your files for cutting, I like to group them all together by color. For this project, I used plain cardstock, but patterned paper would be cute too!

Now that you’ve cut out all of the pieces, it’s time to get creative! This is a good time to add glitter, inking, stamping or other elements to your decorative pieces.

Here’s a tip: Add glitter to your pieces AFTER they are cut. It’s much easier to cut cardstock then it is to cut glitter paper, and it will make your blade last a little longer too! Don’t forget to slow your machine way down to cut intricate details.

For some “icing”, I used a glittered 3d puffy paint. If you want to do this, you’ll have to allow extra drying time before handling. Don’t forget to make certain that your icing scallops are all going the same direction.

Now that your decorative pieces are ready, let’s assemble the box! Starting with the box shape, glue the side tabs pieces to the straight pieces.

Set the assembled box aside, and let’s make the lid, or roof of the box. I added the decorative pieces to my roof first. Apply glue to the tabs and the lid will go together easily.

To add the shingle strips to the lid, start at the bottom. There will be a small overlap, so space the shingle strips ends approximately 1/2″ apart as shown.

Working from the bottom up, glue your strips. When you get to the top piece, add the white “frosting strip.”

It’s adorable already and we are not even done yet! Add the rest of the decorative elements to the box base using the finished photos as a guide. It’s as much fun as decorating a real gingerbread house! Tip: Place the lid on the box before adding the decorative elements. This way, you can be certain that your lid will not cover the cute candy pieces.

You can use enamel dots, glitter glue, ribbon…anything! Be creative and have fun with it!

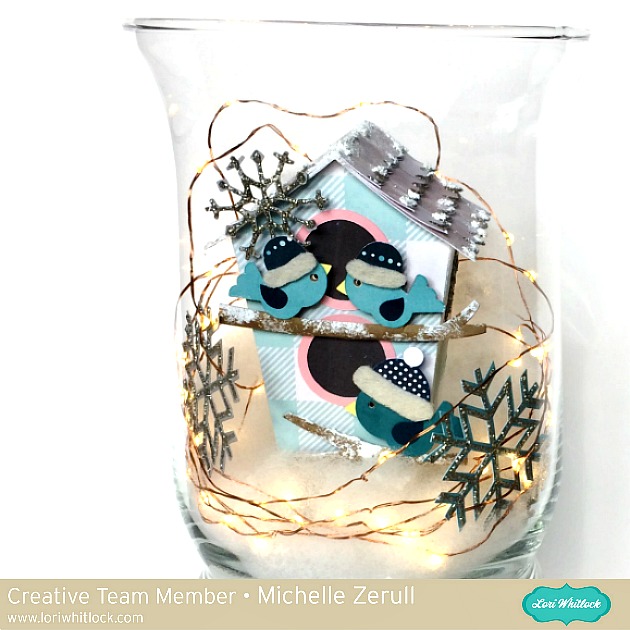
I hope that my tutorial has inspired you to make your own Gingerbread House Box.

Merry Christmas and Happy Holidays to you all!

~Michelle


Holiday Gift Tags with Michelle

Gift giving is my favorite holiday activity. I really enjoy shopping and wrapping and making each gift uniquely special. This is Michelle, and I would like to share some holiday gift tags that I made using using files from the Lori Whitlock SVG Shop.

I crafted a set a four different holiday tags and packaged them in their own special box, which I also made with my Silhouette Cameo. The tag set includes an adorable Santa, a Snowman, a Penguin and a Polar Bear that can be purchased individually from the Silhouette Design Store, or you can purchase them all together in a Christmas Tag Bundle at the Lori Whitlock SVG Shop.

These are easy to assemble and are so much fun to put together! A touch of felt and glitter really makes the designs “pop.”

Using papers from the Echo Park “A Perfect Winter” Collection, I made a sweet little box to house the tags. These are perfect for gift giving, but I’ve decided to keep these cuties for myself! When the tags have been used, I will use the box to hold to store ornaments until next year. The box is actually a Candy Box with removable insert compartments that have a sweet scalloped edge. The Candy Box and can be found in the Silhouette Design Store along with the Compartment Inserts, or, you can purchase the Candy Box at the Lori Whitlock SVG Shop. I enlarged the Box a little bit to house the tags. To do this, simply group all of the pieces together before enlarging. The lid has a clear acetate insert so I can see how many tags I have left.

I hope that you’ve enjoyed my Holiday Tag Set.

Happy Crafting!

~Michelle

“Faux Stamping” with Dingbats Technique by Michelle

Cozy up with the Winter Dingbat Font and make these sweet little stocking-stuffer notebooks!  This is Michelle Zerull and I’d like to share a pocket sized project that can made in practically no time at all.  Perfect for stockings, classroom gifts and coworkers. Make one for yourself too!

For these mini notebooks, I used “A Perfect Winter” papers by Echo Park.  The colors and patterns are great for the holidays and beyond. For the “Faux Stamped” covers, I downloaded the Winter Dingbat Font which can be found in the Silhouette Design Store and also at Lori Whitlock’s SVG Shop.  The books themselves were made from the 2×2 Accordion Mini Album SVG files that can be found here in the Silhouette Design Store and also here at Lori Whitlock’s SVG Shop.  Lori has an excellent Tutorial Video where she shows how to assemble the books. Be sure to watch the seven minute video for Lori’s tips and tricks! I’ll show you here, how to use the adorable Winter Dingbat Font to make the book covers.

I’ve been a rubber stamper for over 20 years.  I love the look, but I hate stamping on my favorite patterned papers.  I’m always afraid that I’m going to get a bad impression and ruin them.  Sadly, it happens.  By using the Winter Dingbat Font, I know that I’m going to get a consistently perfect image every time without actually stamping.  The Winter Dingbat Font contain 26 images and phrases that can be cut, colored and printed in any size your heart desires!  Yes, that’s right…26 images…in ANY size!  This “Faux Stamping” technique is so easy to do with the print and cut feature on my Silhouette Cameo.  It’s my latest obsession!

After downloading your font and SVG design, open up your design area and type in the alphabet using your dingbat font.  Look at all of those images! The hard part is choosing which ones to use!  For this project, I’m going to use three of the phrases. I clicked on the designs, clicked on the fill tool and chose the color black.  I ungrouped all 26 images and deleted the images that I was not going to use.

Next, I opened the 2×2 Accordion Mini Album files. I’m going to cut them all eventually, but right now, I’m working with the covers. I ungrouped the pieces and set them off to the side for later.

I copied the teal front cover piece and made three covers. (I made a lot of little books!)  Move your phrases to the front of the covers and remove the cut lines by selecting “no cut.” Important! Remember to remove the teal color from your pieces and change it to transparent. At this time, I also changed my page setup.  I don’t have a 12×12 printer, so I am going to cut my 12×12 patterned paper down to 8.5×11 so it will feed through my printer.  In order for the Silhouette to read the registration marks, you will need to choose a light colored patterned paper.

Add your registration marks to your letter sized page setup.  Place your light colored 8.5×11 patterned paper in your printer and hit “print.” Voila! Perfectly printed on patterned paper!  Now you can put this sheet through the Silhouette Cameo for perfectly cut book covers that already have the phrases printed, or “Faux Stamped”on them.

Cut and assemble the other pieces like Lori shows in the tutorial video. Instead of using designer paper for the pages, I chose to use plain white pages so I could make them into mini notebooks.

I hope that you enjoyed my “Faux Stamping” with Dingbats technique. The dingbat fonts are so fun to play with!

Halloween Gift Bag with Michelle

Grown-ups like treats too!  This is Michelle here today to share my easy to make paper gift bag that is perfectly sized for little treats to give to neighbors or co-workers.

Lori is busy adding new digital cut files files each week, and these recent additions are too cute to pass up! You can find the digital cut files for this Gift Bag at the Lori Whitlock SVG Shop. The Gift Bag file is also sold at the Silhouette Design Store. The file to create the Rolled Flower is also new. You can find the Rolled Flower at the Lori Whitlock Shop and also at the Silhouette Design Store. The little “Twig” file can be found here.

When you look closely, you can see that the flowers are really easy to make. You just roll them up! Both the bag and these versatile flowers can be used year-round, so they’re great values as well as must-haves!

Crafting and candy are so yummy together. I hope that I’ve inspired you to grab your glue and a candy bar and have a wonderful day!

~Michelle