One Dollar Wednesday at Jessica Sprague

One Dollar Wednesday at JessicaSprague.com!

It’s Wednesday again and that means TODAY ONLY you can snag two digital kits for an amazing deal…
TODAY for JUST $1 you can grab this awesome set: Mary Jane Papers

MARY JANE PAPERS

And, you can get the following awesome product for HALF OFF, which makes it $4 for both the papers and designer elements. Happy Day Collection

HAPPY DAY COLLECTION

While you are at jessicasprague.com getting your kits, be sure to check out the samples made with each of these kits at the bottom of each listing.

Tuesday Freebie Word Circles

TODAY ONLY, this WORD CIRCLES SVG file is FREE with any purchase.

Before coupon code total should be $1.98 or higher. Just add coupon code: CIRCLES at checkout and the cost will be deducted from your purchase. This freebie is good until tonight at midnight.


Here are some of Lori’s newest shapes added to the SVG shop and her Silhouette Portfolio! Thanks for stopping by… Lisa

Only a purchase in Lori’s SVG shop will qualify for the free shape.

Mini Album by Traci and Layout by Mendi

Here we go again, it is already the middle of the month. The best part is that it is Monday, which means our awesome Creative Team is here sharing inspiration with you. First we have an adorable mini album from Traci…
“Today is Always a Happy Day” when you get to create fun projects with Lori’s designs, and I had a lot of fun with this adorable mini album.  This album was created using Lori’s 5×5 album with box.  The pattern comes in two files, one for the box, and one for the album, and the whole project is a snap to put together.
For the base of the box, album pages, and title (which is also one of Lori’s designs and can be found here or at the Silhouette online store) I used heavy white card stock.  I wasn’t sure if it would be sturdy enough for the project, but once I layered all of the other papers and embellishments, it is very durable.
The paper is from the Here & Now collection by Echo Park and the little sun sticker is from  A Perfect Summer line.
The little birds on the branch are an SVG in Lori’s shop called Love Birds.  I chopped one of the little bird’s legs off (poor guy) so that he could sit lower on the branch.
I love how the design of this album has the ribbon/twine holes already punched for you.  I did, however,  use a 1/4″ hole punch to make them a little larger so that my thicker ribbon would slide through easily.
I will have a few more pictures posted over at Artsy Albums today, so please stop by my blog and say hello!
Thanks, and I hope your day is happy!
Traci
Next, is this beautiful layout by Mendi…
Today I turned to the Maggie Holmes collection by Crate Paper and a handful of complimentary cutting files designed by Lori.  I knew I wanted to do something fun with the 12×12 decorative tape sheet from the collection so I cut it into strips, mixing it with other paper strips and adhered them to printer paper.  I then cut my mouse ears out on my Silhouette by welding 3 basic circles together.

I took Lori’s “memories” title from a layout cutting file and paired it with one of her awesome banners which I enlarged to fit over my mouse ears and popped up with foam tape between the layers for some depth.
I also used her scalloped border which I cut twice (once from blue and another without the inside cuts from ivory).  I like to do this to minimize the visual distraction when a patterned paper is layered below my borders.  I finished off my layout with a layered tag to document the basic details of the day.  


To Create my layout I used the following cutting files designed by Lori Whitlock:
Memories Layout (for title)
5 Layered Labels (Silhouette Store only)

New at Jessica Sprague Sweet Life Collection

Check out the NEW kit we have today at JessicaSprague. This fun set Sweet Life Collection is great for many styles of projects. You can pick it up this weekend for 25% OFF on new products. What a deal! Get them for this price through SUNDAY.

SWEET LIFE ELEMENTS

Sweet Life Elements

SWEET LIFE PAPERS

Sweet Life Papers

SWEET LIFE COLLECTION

Sweet Life Collection

Check out these beautiful layouts using this kit by our creative team.
layout by Chrissy Guido
layout by Haley Ney
layout by Kim Lund

Silhouette Tutorial Welding Shapes by Christine

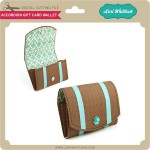
If there is one thing that I love about digital die cuts, it’s that you can have fun manipulating them to make something very different than they might have been intended for.  I took one of Lori’s 4×6 Life Card files and made a mini album from it.  I only used one of the shapes but using the directions that I am going to give you, it will be very possible to make a mini book with different shaped pages.
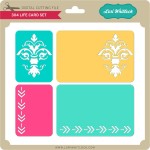
Here is the file that I used.  Once I had my shape on my mat, I actually resized it to a 3×4 size for a mini, mini album, but you can create it in any size that you would like.
Here are some pictures of my finished mini book.  I used Lori Whitlock’s Here & Now for Echo Park paper and embellishment collection to create my mini book.  I’ll have more up close pictures of my mini on my blog if you want to pop on over there.
So now for the tutorial.  How do you take a 4×6 Life card and make it into this ticket shaped accordion mini album?  Let me show you!
Pick the shape that you want to use.  I picked the ticket stye.  Ungroup the file and delete the shapes that you don’t want to use for this project.  Replicate your shape so that you have a row of three.
Move each shape to the left so that they are just barely overlapping.  You don’t want to go too far because it will distort the shape.  You will know when you weld the shapes together you will know if you put them close enough because the middle lines will disappear.
If you move over too much or not enough, just click the undo button and try again.
Tip:  Hold down the shift key while you are drawing your line, to get a perfect straight line.
This step can be done whether you have the basic or Designer Edition of the Silhouette Software.
Sorry, the above direction should say, Copy one of the perforated lines and paste it on the end of the welded shape where you just erased the line.  Draw a short angled line, select it and mirror left under the replicate feature.
Cut out as many of these groupings to make your mini book long or short.
Try this technique with basic shapes or more complicated shapes.  You never know what you can make until you try.
To create the mats for the individual pages of my mini book, I took one of the original shapes and used the inside offset feature.  Those I cut out separately from matching paper.
I hope you enjoyed the tutorial today.  If you have any questions please feel free to visit my blog and leave your question in the comment section.  Thanks!!
Supplies used:
Here & Now paper and embellishment collection by Lori Whitlock for Echo Park