Christmas Card Mini Album with Brandie


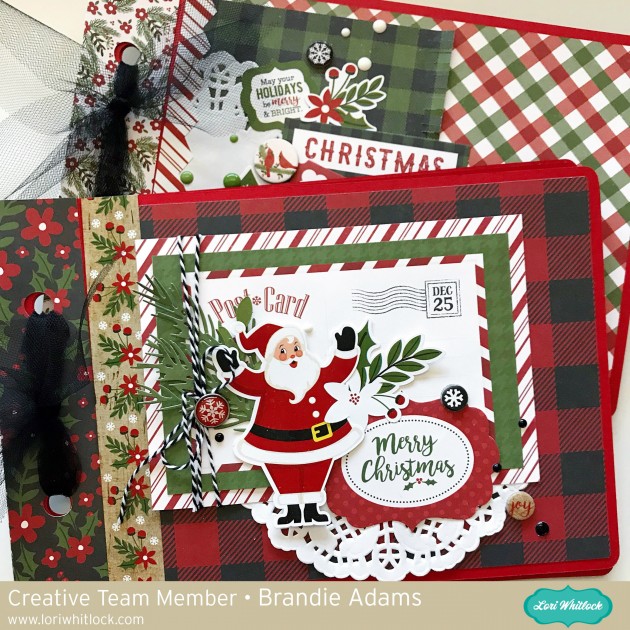
Hi there! Brandie here with a tutorial on how I made this mini album for my Christmas cards. I have been wanting a cute way to display the Christmas cards I get every year and this little album will do the trick. I used the Mini Album Rounded Corners file you can find it here in Loris shop and here in the Silhouette Store.

After I uploaded the file to Cricut Design Space I resized everything so that my largest cards would fit. For this album it is 6.8 inches tall by 10 inches wide. To get the correct proportions for all the pieces select all then use the arrow corner to enlarge everything.

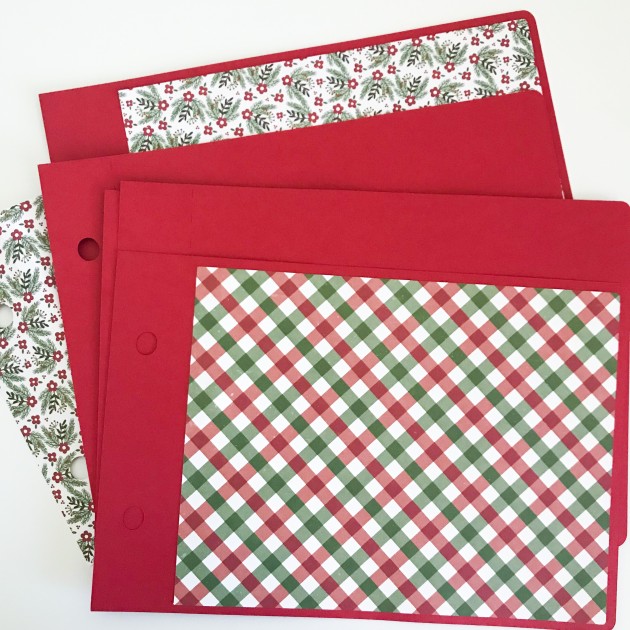
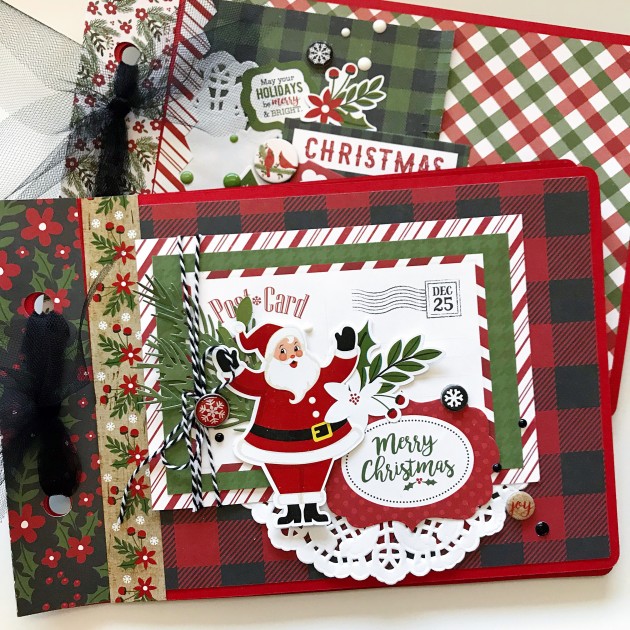
Once I had everything cut I added my decorative panels. I also decorated the fronts of my albums with the papers and embellishments from Echo Park’s A Perfect Christmas collection.

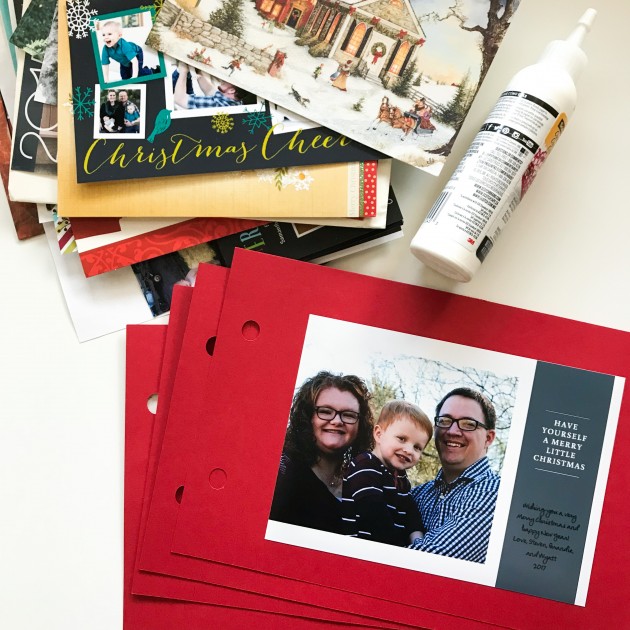
Then I glued my Christmas cards to the pages.

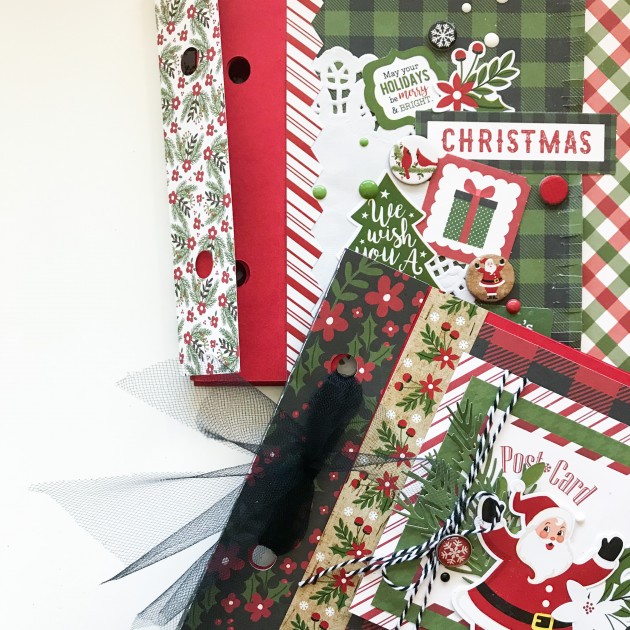
I placed the binding cover and tied them with tulle.

Now every Christmas I can pull them out and look back to see how family and friends have changed over the year as the new cards come in.

Thanks for stopping by!

Brandie

Neighbor Gift Idea with Brandie

Hi there! Brandie here with a quick and easy neighbor gift. I am using the Santa tote file you can find it here in Loris shop and here in the Silhouette store.

The only change I made was to resize him to fit a small package of store bought cookies. I also tucked a few of the Christmas coloring cards inside as well for my neighbors with little kids. You can find coloring cards here in Loris shop and here in the Silhouette store.


Tied up with a little tulle he’s ready to be delivered.

Thanks for stopping by!

Brandie

Vintage Style Christmas Sign Tutorial with Brandie


Hi there! Brandie here with a tutorial on how I made this Christmas sign using the Sleigh Rides on Santa Claus Lane file. You can find it here in Loris shop and here in the Silhouette store.

After I got my image uploaded and sized accordingly I cut  out the image on vinyl to create a stencil. While my machine was cutting the images I painted the white layer on my barn wood square.


I painted one thin layer of white acrylic paint and did not go all the way to the edge of the wood to help give it an aged look.  While the paint was drying I weeded the vinyl. To create the stencil I removed the inside parts and kept the negative image.
To apply the stencil I cut the image into thirds  and applied to the dry painted wood. I am the queen of eye-balling things and did that here. But transfer tape would help with applying the stencil to the wood.
Once the vinyl was applied to the wood I rubbed everything down with the long flat side of a bone folder being careful not to gouge the wood. I used red acrylic paint and a stencil brush to apply the paint in thin layers.
After I had the color and coverage I wanted I gently pulled the vinyl off the wood.
I then used a hand-held sander and carefully went over the sign.
Here it is all ready to add to my Christmas décor. I love how it turned out and have plans to make another one with a  nativity file next.
Thanks for stopping by!
Brandie

Bobbin Shadow Box Card Scene with Brandie

Hi Everyone! Brandie here with one of Loris shadow box card scenes.

I love that this card goes with the new I’d Rather Be Crafting paper collection by Echo Park. This card will be perfect for all your crafty friends.

The print and cut feature makes assembly so quick and easy. The hardest part is picking out your paper! You can find the file here in Lori’s shop and here in the Silhouette Store.

Thanks for stopping by!

Thanksgiving Napkins with Brandie

Hi Everyone! Brandie here with a tutorial on how I made some pretty napkins using the Split Pumpkin Set  (Silhouette store) and the Darling Script Font (Silhouette store) .

I wanted something to spruce up my Thanksgiving table this year. I’ve never had a fancy table-scape and probably never will, but a girl can dream. With this project I will get a little closer to that goal.

For this project I used 100% cotton napkins, gold glitter heat transfer vinyl, brown glitter heat transfer vinyl, parchment paper, and an iron.

First I added the font to my computer then uploaded the split pumpkin to Cricut Design Space.

I sized the pumpkin to a width of 3.1 inches and a height of 3.4 inches. I then welded the image so that when I send the pumpkin to the mat the top and bottom of the pumpkin will cut stacked on top of the other like in the picture. For each name I adjusted the letter spacing so that the letters touched I then welded the letters together so they will cut as one piece as well.

Since my name is the longest I used it as the guide to size the other names. The height is .72 inches for all of the names and the width vary for each name.

Once I was happy with the sizing I was ready to cut. I turned on the mirror image for both mats, adjusted the images on the mat to give myself a little more room for weeding, and cut the images out of the heat transfer vinyl. When applying the vinyl be sure to put the shinny side down on the cutting mat.

I washed and pressed my napkins. I also dry fit the two images  so that they would be in the bottom center on the napkin.

I always use a piece of parchment paper between the vinyl and iron. Then pressed  the vinyl with as much pressure as I could to get a good adherence. I then flipped the napkin over and pressed the back of the image. I then repeated the steps for the name.

Here they are finished and ready for my Thanksgiving table. Thanks for stopping by!

Brandie