July Off the Page Challenge with Paper Issues

  It’s time for the July Off the Page Challenge over in the Paper Issues Friends and Fans Facebook Group!  This month’s challenge is all about summer and summer celebrations! We are looking for all of your paper projects with a summer theme… 4th of July, Canada Day, patriotic & military welcome home/send off parties, pool party, picnic, beach theme…  Invitations, cards, favors, banners, gifts, décor… any paper project that isn’t a traditional layout will work!  Of course, we would love you to use Lori Whitlock files!   For my project, I used the 3D USA Décor Blocks from the Lori Whitlock SVG Shop.  (Here in the Silhouette Store)

I thought these were so cute, and although they were done for the 4th of July, I can see them sitting on my shelf all year long!
Be sure to play along with this challenge by posting your project in the July Challenges Album in the  Paper Issues Friends and Fans Facebook Group in the comments under this project.  Each project posted will give you an entry to win a $10 Gift Card to the Paper Issues Store!  You have until August 1st to enter!  I can’t wait to see what you create!

Oven Cookie Box Assembly

Hi everyone!  Corri here today with a quick assembly tutorial for Lori’s adorable oven cookie box.   This cute box can hold a stack of cookies plus something else in the drawer.  So fun!

Let’s get started.

The pieces in the file are sorted by color.  These are the light pink pieces which form the base of the oven box.

Fold along all the score lines, apply glue to the  tabs to make the individual boxes that form the oven.

You will end up with the lid, the oven, the two pieces that make up drawer and the little part where the oven dials go.   You can add some brads or enamel dots where the little holes are before closing up the tabs.

Glue the oven portion on top of the drawer part.  You will use cover panels to hide the seams in the next step.

Next you can cut the cover pieces (they are dark pink in the file). These can be from patterned paper.  You can cut them all on one 12 x 12 sheet.    I used this cute polka dot print from the Echo Park’s Happy Summer Collection.

Match the cover pieces up to the base layer and glue in place.

These extra panels give the box a nice finished look.

There you have it!  I hope you’ll give this fun box a try.  Be sure to stop by Lori’s SVG Shop to check out all the newly added files.


Wednesday Freebie and New in Shop

ALL WEEK, this SVG file is FREE with any $1.99 purchase!

We have a FREE file with purchase all this week! Simply add this Star Lantern file is to your shopping cart along with ANY $1.99+ purchase from the SVG Shop and this file is yours FREE. Be sure to use Coupon Code: STAR  (case sensitive) at checkout. This offer is good through next Sunday.

(Your cart must reach at least $3.98 before the coupon will be applied and then $1.99 will be subtracted from your total at checkout. The files will be available for immediate download after you pay for your order by visiting MY ACCOUNT>COMPLETED ORDERS>ORDER DETAILS inside of your account. Only one discount code per order allowed.)

In addition, don’t forget about this special ! You can get this Free Kit of the Month with any $20 purchase (Purchase must be in one transaction.) Simply add the July Kit of the Month to your shopping cart along with ANY $20.00+ purchase from the SVG Shop and this file is yours FREE. Who wouldn’t want to get one of these on their special day! Be sure to use Coupon Code: JULYKOTM (case sensitive) at checkout. This offer is good through July 31st!

(Your cart must reach at least $20.00 before the coupon will be applied and then $7.95 will be subtracted from your total at checkout. The files will be available for immediate download after you pay for your order by visiting MY ACCOUNT>COMPLETED ORDERS>ORDER DETAILS inside of your account. Only one discount code per order allowed.)


Check out our awesome SVG files releasing this week! And, just like always, the NEW files are ON SALE 25% OFF through the weekend in the SVG Shop! These downloads include SVG files for sure and PNG or PDF files when appropriate. No coupon code necessary, the files are all discounted in the shop! Be sure to go get them while they are on SALE this week.

Thanks for visiting the blog today! Please let us know if you need any help with your files. We want to make sure everyone is happy with their purchase. Have a great week!


Guest Blogger Melissa Viscount from Silhouette School

Hi! I’m so excited that Lori has allowed me to take over her blog today! My name is Melissa Viscount and I am the blogger behind Silhouette School and the author of The Ultimate Silhouette Guide ebook/book series.  I love teaching crafters how to use the Silhouette CAMEO, Portrait, Curio and Mint machine! Lori has so graciously allowed me to share a few of my tips and tricks for cutting paper cleanly with you today!

Paper crafts are hugely popular with Silhouette CAMEO and Portrait users – the problem is paper can be a bit tricky to cut with the Silhouette cutting machines.

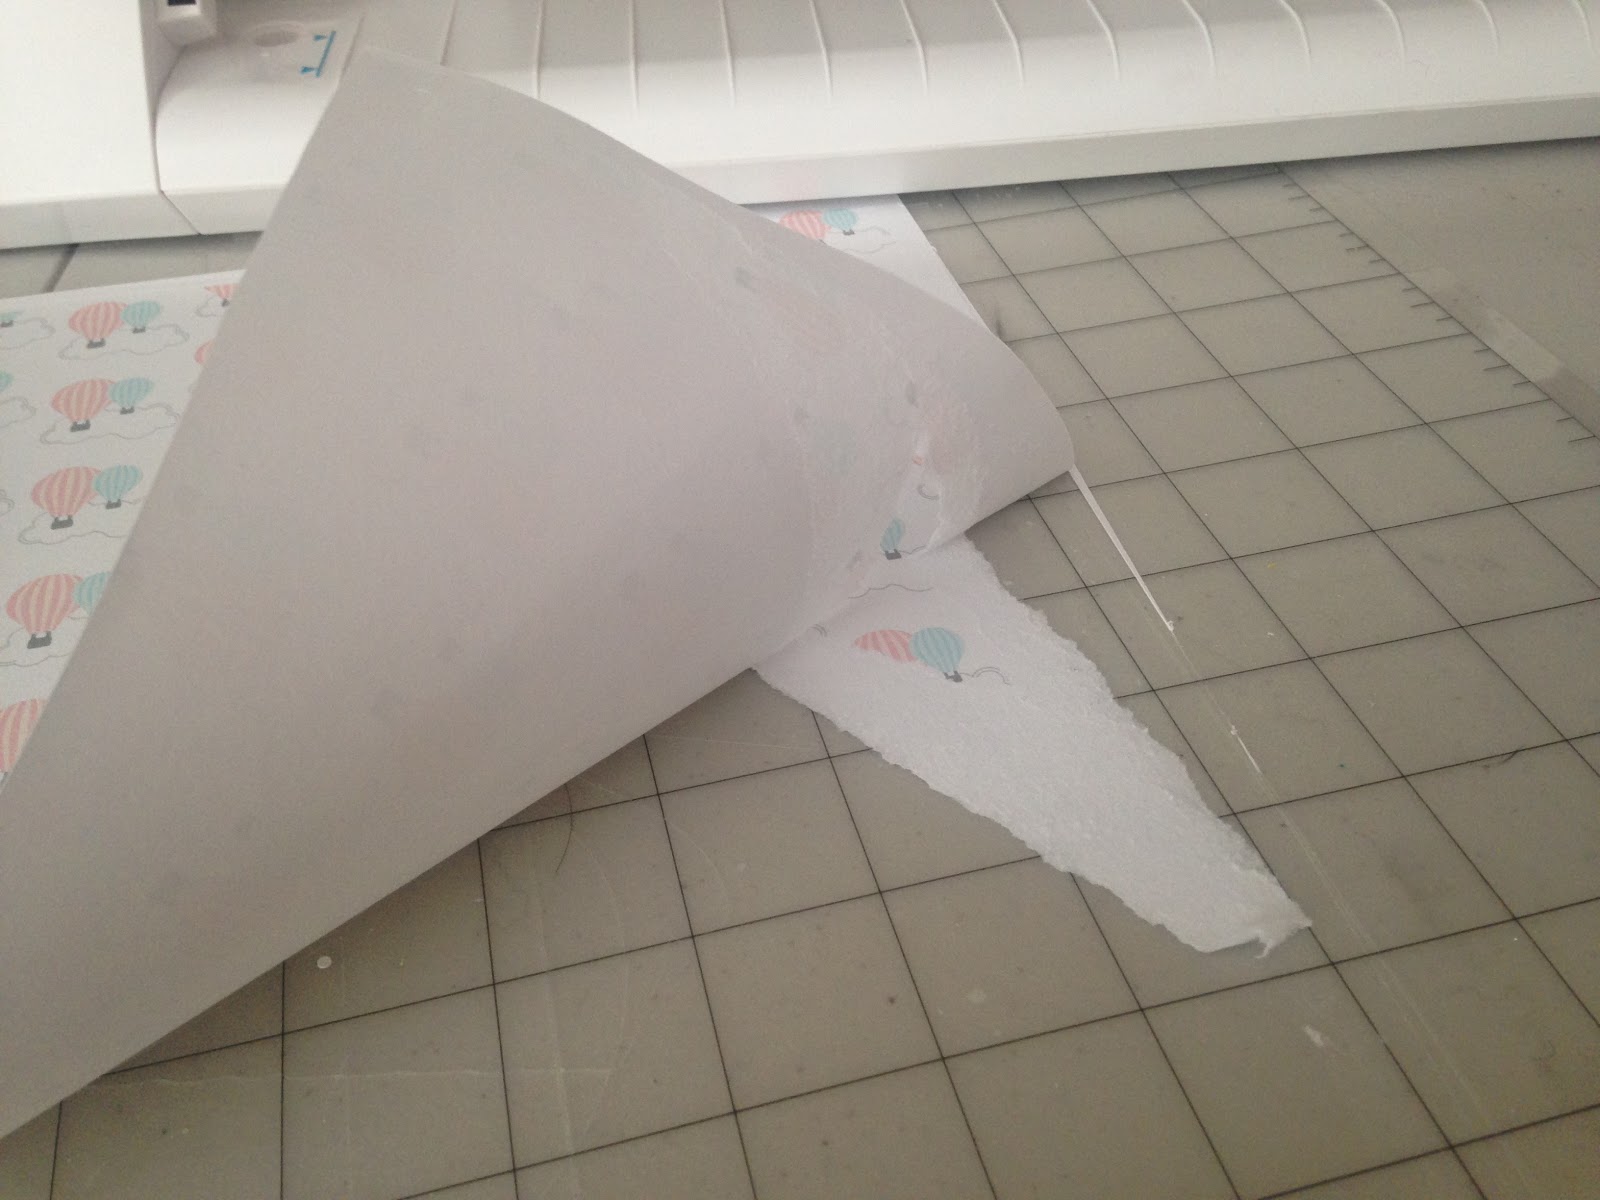
Getting a clean cut on paper starts with having the right Silhouette cutting mat. A new mat or gently used mat can be overly sticky which can spell disaster for paper cuts.  A mat that’s too sticky will keep the paper in place while cutting, but it will likely create a mess and a headache while trying to remove the paper from the cutting mat after the cut.  The paper may curl as you try to release it from the cutting mat – or worse – separate leaving a thin layer of paper on the mat.

To avoid this common problem while cutting paper with the die cutter, de-sticky the Silhouette cutting mat by blotting it with a clean cotton pillow case or t-shirt before placing the paper on it.  This will keep the mat clean, while gently taking away some of the stickiness of the mat.

Another option is to cut paper using the Silhouette Light Tack cutting mat. This cutting mat is specially designed for cutting paper with Silhouette CAMEO or Portrait. It’s not nearly as sticky as the regular cutting mat making it perfect for paper – which doesn’t need quite as much stick as vinyl or other materials to stay in place while cutting.

The next thing you want to do to get a better paper cut with your Silhouette machine, is make sure you are using the Line Segment Overcut feature in Silhouette Studio.

You can find the Line Segement Overcut option at the bottom of the Cut Settings window in Silhouette Studio. Use the scroll bar after you select the material type, to scroll down and you’ll see it.

After selecting “ON” in the Line Segment Overcut area, adjust the distance of the overcut.  Adjusting to 0.1 mm and 0.1 mm is usually plenty.

The way overcut works is instead of the blade staying down in the paper and turning at hard corners and angles like it would at each corner of this square…

….it instead overcuts the corner by a small distance (0.1), then lifts up out of the paper to make a new connecting cut.

The overcuts will NOT appear in Silhouette
Studio.  I have drawn them in here so you can more easily understand.

Think of it cutting a corner like an X rather than a V.  That slight overcut is small enough that it isn’t noticeable to see on the paper once cut, but it makes a huge difference in preventing the paper from being torn up, chewed and pulled while cutting.

Look at the difference in how the Silhouette CAMEO blade cut this small triangle on nearly-impossible-to-cut-cleanly construction paper!  Both triangles were cut with the same exact cut settings – except the Segment Line Overcut was turned on for the triangle on the right.

Finally, consider a double cut when cutting paper with Silhouette CAMEO. A double cut is often the difference between a soft ‘furry’ edge and a clean, sharp cut. Imagine cutting with a dull blade vs a super sharp blade.

You can find the box to turn on the Double Cut in the Cut Settings window. After you select the material type, use the scroll bar on the right side of the window to scroll down and check the box.

Of course, before you commit to any or all of these tricks for cutting paper, you will want to be sure to use the test cut option to ensure the settings you are using will provide the best quality cut. If you skip the test cut, you risk wasting a whole lot of materials, as well as time.

Thanks again to Lori for allowing me to share a few Silhouette CAMEO tips and tricks with you today! Be sure to get schooled on all things Silhouette related at Silhouette School blog! You can also find Silhouette School on Facebook, Instagram, YouTube and Pinterest!

 photo 2b820f06-c93b-4b24-929c-96287390140f_zpsf3cd3a23.jpguse twiter photo Twitter_48x48_zps4e06061c.pnguse twiter photo Twitter_48x48_zps4e06061c.pngUse Feed photo Feed_48x48_zps63f27a4f.png photo 2b820f06-c93b-4b24-929c-96287390140f_zpsf3cd3a23.jpgUse Feed photo Feed_48x48_zps63f27a4f.png


Get Silhouette School lessons delivered to your email inbox! Select Once Daily or Weekly.


4th of July Party with Lori’s New Sizzix Dies

Hi Everyone!  It’s Kathy today here to share a fun 4th of July Party set I created using Lori’s new Sizzix Dies!  Take a peek…

I started with the new Hello Doily Sizzix Thinlets Set to make my banner.  I simply layered two of the doilies and folded them over a piece of twine to create the banner.  It would be so cute in a doorway or along a table edge!

Next I set together to make some fun serving items.  I used the oh so versatile Mix and Match Flowers Thinlets to decorate some serving items including the napkin holder, the bucket and Straw…

The label on the milk bottle is from the new Perfect Labels Thinlets Set, I thought it would be good to let folks label their drinks to keep the bottles from getting mixed up!  The butterflies on both the bottle and the bucket can be found in the Butterfly Lantern Thinlets Set.  I think this might be my favorite set!  Check out the adorable little lantern you can make using it!

You can fit a tiny electronic tea light into the lantern, to light up your night time table!  That’s it for me today, make sure to check out all of Lori’s Sizzix Dies over on the Sizzix Website here.  You won’t be disappointed!

 
Papers Used:

Echo Park Pinstripes
Echo Park Petticoats
Echo Park Little Man